http://nature.berkeley.edu/biometlab/espm129/
Draw the page down a bit and you will find seperated PDF files for each chapter. It explains lots of useful basic concepts for plant ecology. Very useful if you are just a plant ecology student.
Notes to share in plant biology study
http://nature.berkeley.edu/biometlab/espm129/
Draw the page down a bit and you will find seperated PDF files for each chapter. It explains lots of useful basic concepts for plant ecology. Very useful if you are just a plant ecology student.
UPDATE! This small guide now is edited and published in UV4Plant Bulletin. Check it out here.
After learnt from Pedro, I have been using ImageJ to calculate leaf area and stomatal size. Here I write it down step by step and hope it would help.
My ImageJ version is ImageJ 1.43o. The plugins I am talking about here should be already installed once the whole software is settled down. You always can check if there are more suitable plugins for your own purpose. (http://rsbweb.nih.gov/ij/plugins/index.html)
Scale bar
For all kinds of calculation, you always need scale bar for ImageJ to convert the actual pixels on the picture into the unit you need. It should be set in the beginning so no matter what treatments you do on the image, it won’t affect the the scale in the calculation.
1. An item, e.g. a line or a cube, whose unit is clear, should be photographed with your object together. They should be kept at the same height. Then it will be the scale bar for your image.
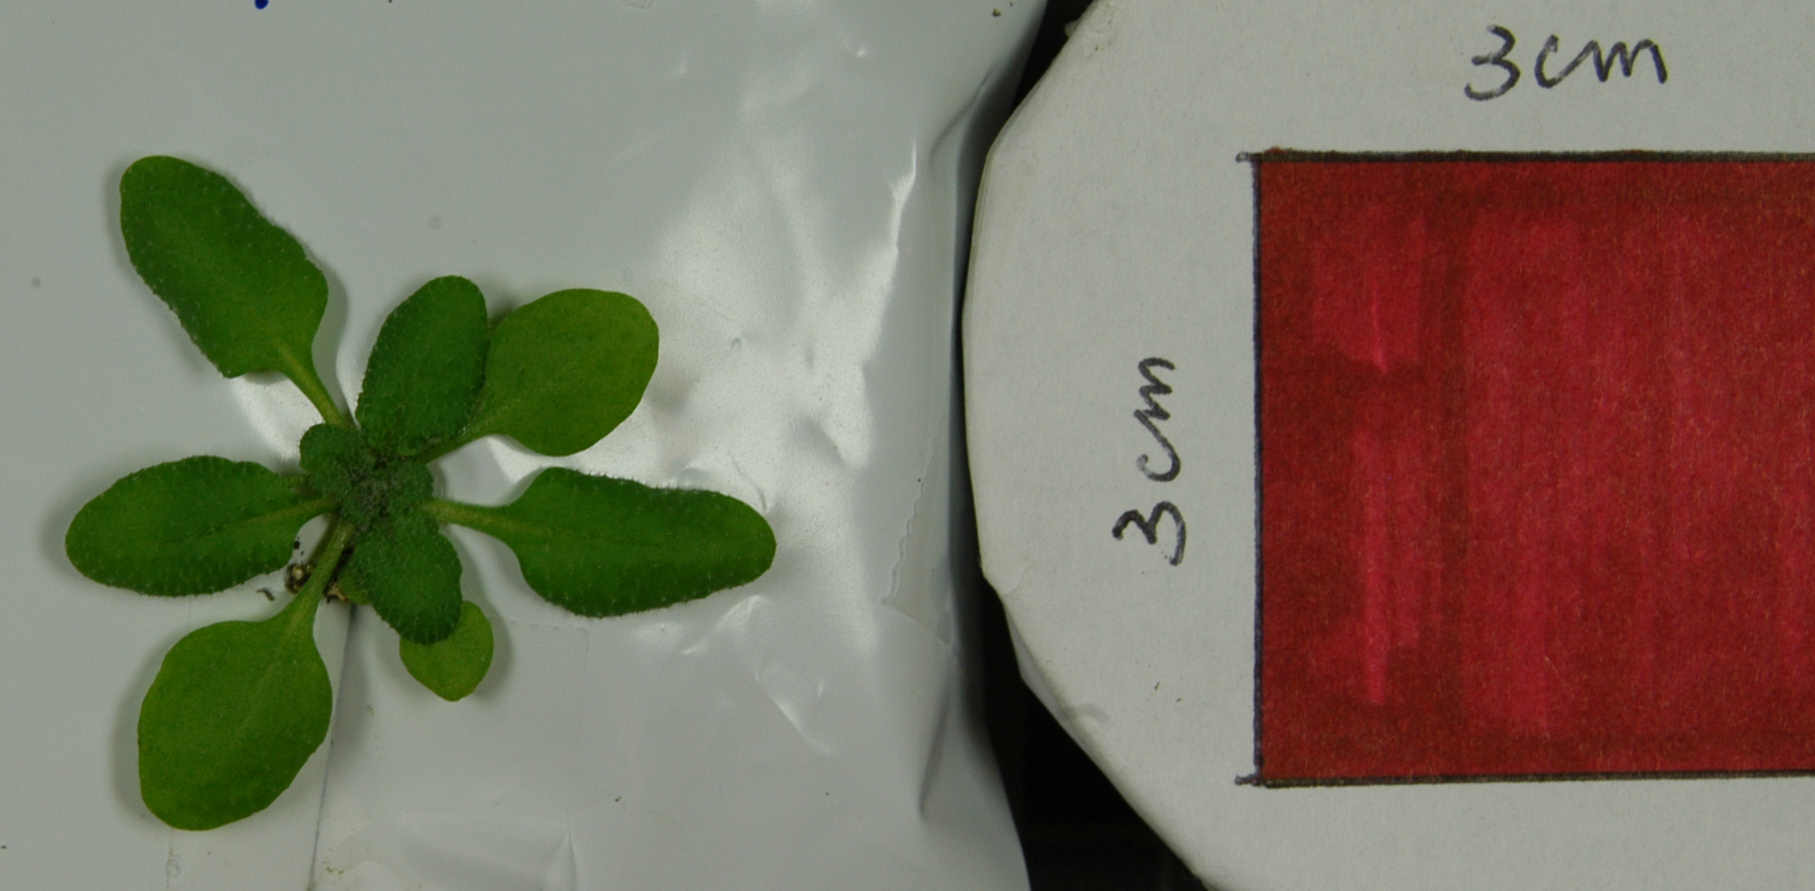
Area calculation sample image
2. Select straight line tool on tool bar in ImageJ. Drag a line along the scale bar. Enlarge your image to do it if you want more acurate result.
3. Menu>Analyze>Set Scale. In the dialog, Known Distance is the real length of the scale bar and Unit of Length the real unit. Tick “Global” if the scale bar is applied on all the images you are analyzing.
For the microsope pictures, a scale bar can also be set into the image. I am using Leica Application Suit as the software for Leica DM2500. When acquiring the image, the right lens magnification should be set and right scale bar needs to be calculated. If you are using “Default” in the calculation part, it should be just fine. One needs to go to “process” part to merge a scale bar into the saved image. Tick “Show” in Scale Bar settings. Change the length and endings if you want. In Fonts, you can select colour and size for the bar. And press “Merge” and “OK”, you will get the image with the scale bar. You can use one image merged with scale bar for all the pictures in ImageJ, choosing “Global” when setting the scale bar. But if you want to save onto every image, then go to Preference on the top of Leica Application Suit software. There is an option for the actions after saving the image. You can choose “Open in Process” so that everytime after you acquire an image, it turns to Process directly.
Lengh
It is quite simple. Select Straight line tool in the tool bar and draw the line on the object you want to measure. Go to Analyze and Measure. If you have lots of items on the image and want to mark after measuring, go to Pugins>Analyze>Measure and Label. You can set a shortcut for Measure and Label in Plugins>Shortcuts>Creat a Shortcut. A single key on the keyboard can be set. Check in Plugins>Utilities>List shortcuts to see what keys are still available. Usually all the letters and 1-5 are taken.
Area
Usually a RGB image is difficult for area calculation. So try to photograph your object on a white background shown in the sample image.
1. Split into red, green and blue channels. Image>Colour>Split Channels. It generates three individual images from the original, looking like black and white. Image titles will show each one’s channel. Usually red one is the best for analyzing.
2. Image>Adjust>Threshold. Adjust the second bar to change the colourful area which covers the area you want to calculate.

3. Select Rectangular tool in the tool bar to restrict the area you want to calculate. For instance, in the sample image, if no selection is made, ImageJ will caculate all the red area.
4. Analyze>Analyze Particles. I usually tick Display Results (show every lable’s area) and Summarize (the sum area of the selected). “Exclude on the edges” will eliminate the holes on the edge and “Include Holes” will add up the hole inside the area. In the Summary box, Total Area is the final result.
I tried the plugin Pedro mentioned in the comment. It is pretty handy.
In the Plugins, there are plenty of useful applications. Cell Counter, for example, would be quite a relief for cell microscope plates.
